Pre-amplifier with microcontroller control. Version 2.0.
Now everything is in order.
amplifier is built in a modular fashion, that is, the individual modules, each can perform at will and preferences. This particularly applies to the output of power amplifiers (UMNCH), power supply (PSU), protect the speakers (AS). In this paper we elaborate on the input module (TDA7313) and the control processor module (M2).
The scheme of the module:
Chip TDA7313 is included on the template specified in the Datasheet and has no singularities. On the model and debugging I soldered the module completely on SMD elements, but the sound quality is not good, so the final version of the all-through capacitors are replaced by film K73-17. The sound quality is improved. I arrange it well.
As applied to the input terminal block of 6 RCA. The photo shows the assembled unit which. Output connectors - type HU / WF. You can apply the same or separate connectors RCA. Unit is powered from the power supply voltage of 9 volts. More features of the M1 unit has not. PCB pattern and assembled block is shown below.
Probably the main module in the design. On it, and the tuning knob on the unit have focused my efforts.
How good or bad I do not judge you.
circuit modules:

The main parameters of the module:
1. Volume Adjustment (16 levels) as the old version;
2. Gain control (4 levels),
3. Adjusting the bass (16 levels)
4. Adjusting the treble (16 levels)
5. Adjusting the balance of the front speakers (16 levels)
6. Adjusting the balance for the rear speakers (16 levels),
7. LOUDNESS - On / off tonkonpesatsii;
8. Mode MUTE;
9. Mode STANDBY;
10. Time display mode MUTE and STANDBY and After 10 seconds, when there was no taps on the keyboard and the other control actions;
11. Control of all functions with keyboard, remote control (RC) remote uses standard RC-5 is one of the most common;
12. Control via the tuning knob (encoder);
13. Control of temperature or internal temperature of the radiator in the case of two channels. On the basis of sensors DALLAS DS18x20. If you exceed the set temperature control turns the cooling fan
is now more:
The module is assembled on a printed circuit board design which is given below
The assembled module:
The module is used mostly SMD components (resistors, capacitors).
ICs in DIP packages, as at the time of the assembly I did not have them in the planar version, and so would they just did (and even smaller hole size). Diode VD10 positioned on the opposite side of the board.
Amplifier control is performed using the keyboard and the remote tuning knob remote control.
remote control I used the old version of the device. One can use any control that operates on standard RC-5. I have here is - on it and it is written RC-5.
Red button - STANDBY
With pattern dynamics - MUTE
1,2,3 - Select Channel
Menu - MENU
Txt - LOUDNESS
-Vol, Vol + - LEFT, RIGHT
Ch (Up) - UP, Ch (DOWN) - DOWN
keys to change the destination, need to change the key codes in the file preamp.h , and recompile the project. I used when developing WinAVR compiler version from 2006.
Keyboard
Scheme:

The keyboard is built into an array of 12 buttons (4x3):
INPUT1 - choice of one channel;
INPUT2 - choice of 2 channels;
INPUT3 - choice of 3 channels;
LOUDNESS - on / off tonkonpensatsii;
MUTE - Mute (shutdown occurs gradually rather than abruptly ). Press again to turn mute;
STANDBY - off the amplifier. Disconnects the power amplifier and its power supply, processor module operates in standby mode;
MENU - button to enter the sub-menu, it is possible to set additional parameters, such as time, date, temperature operating temperature sensors control radiators;
Pressing this button In this mode, you return to the main menu amplifier control without changing the settings. For the new settings have been saved, you must click on SET.
SET - as mentioned above, it is save the new settings in the submenu.
the main pressing the SET button you can see the temperature of radiators, the information is displayed within 2-3 seconds.
UP / DOWN - Move to the previous / next menu or submenu;
LEFT / RIGHT - increase / decrease in the relevant parameter that is displayed on the LCD.
Key button practiced the program almost immediately, but the depression and the response to the STANDBY requires pressed for about 3 seconds. MUTE buttons and LOUDNESS about 1 second. This is done to avoid triggering an accidental click on these buttons especially if you use the remote control. circuit board for the keyboard at first I did not want to provide, since it depends on the design of housing and personal preferences, the placement of buttons and everything else. But for example, decided still lead. Here it is:

But just warning you that it was bred for a specific case and my preferences.
And matrix layout of buttons here does not match the keyboard diagram. Special problems it causes, because you can change the key codes in the program and recompile the project, which allows plant matrix as he wants (though if there is little experience in programming.) Otherwise it is better to dissolve the matrix according to the original scheme, since the firmware is listed under it.Example test board where the circuit layout corresponds to the scheme

Walkover.
At the beginning of the development I did not have the industrial walkover, had to think of something. Climb over the Internet, I found that suited me - it's the tuning knob on the basis of the stepper motor from the old 5 inch floppy disk drives.
Since it (the engine), I had decided to apply it, and as it turned out for good reason.
walkover earned immediately and as it turned out, then has another advantage - it does not bounce (he has not physically). Program for processing to be simple and very good work. Realizing that not everyone has the opportunity to find an engine, I ordered the industrial walkover, and when he came, I started experimenting with it. That's where my problem began. Valkoder not worked steadily and missed pulses (the reason was because of the bounce). I will not describe the "war" with these. In the end, I got reliable operation and industrial walkover.
But the negative point still remains, it is different microcontroller firmware for different types of tuning knob (motor industry). Versatile has not turned out (but I decide this problem.) Here is a diagram and pattern of the printed circuit board assembled tuning knob on the basis of the engine:

When rotating clockwise - simulates pressing the RIGHT.
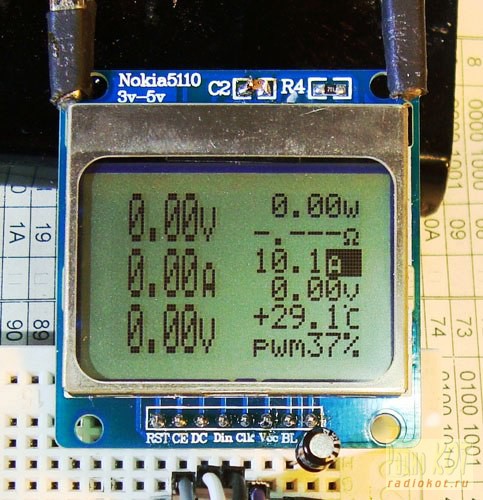
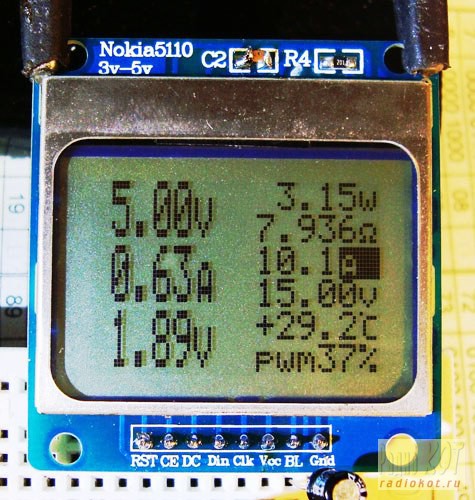
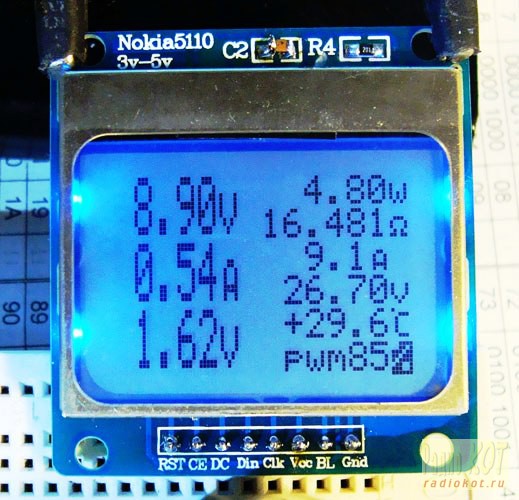
Turning counterclockwise - simulates pressing the LEFT. Main Menu Management amplifier consists of the following items: Volume (Volume) Attens (Gain) Bass (Bass) Treble ( Treble) Balans F (Front speaker balance) Balans R (rear speaker balance) and as previously described, the movement through the menu buttons UP / DOWN (keys and remote), but adjusting keys LEFT / RIGHT (and the tuning knob). This mode works as the key SET, while you click on that for about 3 seconds displays the values of temperature sensors. When you press the MENU button we get to the sub-menu to set the parameters. time, date, and the maximum temperature for tripping temperature (including cooling fan). This menu consists of items: "Set Time: Hour" (set time - hours), "Set Time: Min" (setting time - minutes), "Set Time: Sec" (set time - seconds), "Set Date: Day "(setting the date - the day), "Set Date: Mes" (setting the date - month), "Set Date: Year" (setting the date - the year), "Set MAX DS18x20" (set temperature Thermal protection) - the value of 45 up to 75 degrees. In this mode, the motion through the menu buttons UP / DOWN (keys and remote), but adjusting keys LEFT / RIGHT (and the tuning knob.) In any of the items, if we press the key MENU, then we go back to the main menu without saving the new setting, and if you press the SET button and save changes parameters. Here is a few drawings with images regimes. Sorry for the quality of pictures. My camera can not be better, but I think you will understand and get an idea of what's what. presents, not all possible modes of operation, there is no such MUTE, a start-up, etc.
Temperature sensors series DS1820. There have also been tested and type DS18S20 also showed his best side, but with sensors DS18B20, as written by our comrades who have repeated and assisted me in testing said that sometimes slipped in the derivation of the values of temperature of 85 degrees. As long as I do not have such a presence, and in the shops of the city, too, are not selling - for some reason. So I can not check.
If the temperature sensor is not connected, the functions of the program to monitor temperatures are disabled.
The following firmware is implemented as remote control setting for any keys that are comfortable to the user for a specific console.Installing FUSE Microcontroller ATMEGA16-16PU is shown in Figure

I'm "sews" STK200 programmer program PonyProg.
This bunch has never failed me, and I use it for several years - no problems at all. If a laptop, then use the USB programmer from Protoss AVR910.
processor module is powered from a power supply of 5 volts and consumes ~ 150-200 mA (depending on the LCD display and applied it to light). I used indicator of WinStar WH1602D.
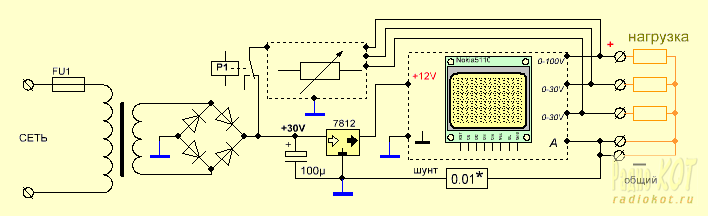
power supply for the modules M1 and M2 are built on the classical scheme and has no singularities.
should be specified only that the power supply 5 Volt is plugged in constantly to provide standby (STANDBY).
circuit power supply module:

Connector X23 - this is for the fan power for cooling. Diodes VD10-VD12 is quenching diodes to reduce stress. Their number can be increased or decreased. I sought the fan normally turned on, rotate fast enough, but the main thing that made any noise. You can of course go the other way - a lot of options here. You can put another regulator, such as the 9.8 volt type 7808-7809 or to make LM317 adjustable voltage output. Since the 0.12-0.2 A fan uses the heatsink is not needed. If you have a transformer with two secondary windings, it can be two separate and replaced by one. And one more note, although the power supply circuit is quite simple, take it seriously, especially if you are using a pulsed sources. Those who assembled the device and switching power applied to poor filtering of interference led to lockups. 5V power supply to run continuously when using the STANDBY. Therefore, it is desirable to make reliable high enough.
And finally, I'll write a little about the output of the amplifier, such as the power supply UMNCH, PA amplifiers themselves and protection unit speakers. While these schemes and are, but I drew them can say for myself, that would have been as it were complete.
These schemes are not designed by me (links to the developers and their sites are shown in the diagram) and that either talking about them, I do not see the point. One can say that all of them have been collected (and time) and tested me. They showed their best side. They began working immediately without any settings (thanks to the authors) and have a good performance for the quality of the sound. I was quite happy.
you can use almost any amplifier and speaker protection, which is more comfortable with you.
I have not brought any protection scheme speakers (even for an example) for the reason that I have not completely decided on the scheme. But for myself, I'm going to do exactly. Tend to protect fellow Kotova (for searching the Internet, looking for easy). I repeat - you can use any that meets your needs.
This amplifier to my knowledge was repeated several people (not including me)
That's all friends,
I hope I'm not tired.
schema reference modules, printed circuit boards, firmware for the two types of encoders and the source code of the program for the microcontroller See below, explore who is interested learn, upgrade and share with others.


